Alan
Radue of Detroit, Michigan owns this extremely rare 1955 Charles Lloyd
designed and built, 280 cubic inch class hull, measuring 16' 2" and is
powered by a 265 cubic inch Chevy V8.

 This hydro raced competitively all the way up until 1980. Some of the names
it campaigned under, starting in the late 50's with Too Much, Jr,
the 1960's as Ji-Mar and Toot Sweet, early 1970s as
Suzys
Kitchen, the mid 1970s as Scruluce [screw-loose], and ran from
1975 to 1980 as Agitator. The last owner put on new decks and sponson
tops.

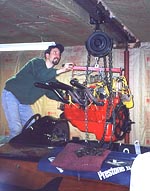
This is the 'I' beam hoist system I designed
and put into my garage.
Cost was 120 bucks (not including hoist/trolley)
- works fantastic!
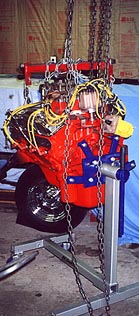
Picture of engine on stand!
Made it out without any problems!

Cockpit interior before any scraping........doesn't
look too bad in the photo.........but in reality it is a mess.......very
musty and the paint is in poor shape.........moisture is trapped between
paint and varnish.......the boat will seemingly never dry out!
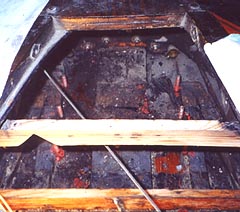
Rear compartment (under tail fin).
And yes, somebody actually had a bilge pump
in there!
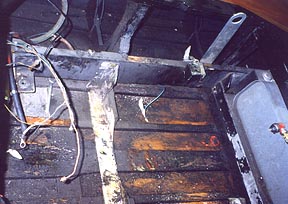
Engine compartment after minor scraping to
make sure the boat was still there!

Frame work - engine compartment -
paint eventually comes off to reveal the
wood under it!

Slowly the paint comes out, kinda looks like
the scene of a fire!
Nope! Just rotten paint!

In the large areas this works great.........wish
I could fit this everywhere (only could be used on the bottom).
 Here is a puzzle worth two points:
Find the hydroplane (one point).....Find
the idiot (second point). Scraping out a hydro with the deck skins
still on is not recommended unless you love your hydro so much you find
yourself sleeping in it. Actually, I'm scraping up front in the nose of
the hull and working on a patch on the inside of my sponson.
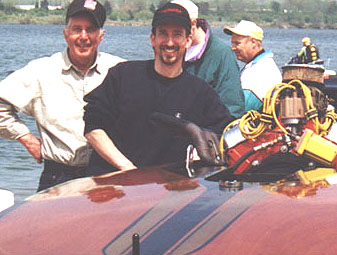
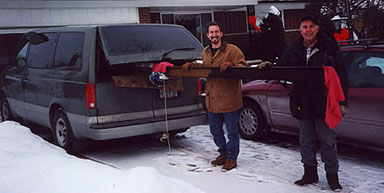 Here is a picture of my Dad and I when we delivered the 'I' beam we used
to make my hoist. I got a chuckle out of it and thought others might
too! Seems to 'humanize' all of our efforts..sometimes ya gotta do
what ya gotta do! If I had to guess how many states this is illegal
in.....I would have to say ALL OF THEM. I recommend slow driving, very
careful turns, flashing lights and many side streets when taking my transportation
advice.

The inside after much scraping. I chose
not to use chemical stripers because of the difficulty of actually being
able to get out all of the stripping residue before applying epoxy and
multiple layers of varnish. I wanted to make sure the penetrating
epoxy and the varnish would not be repelled by anything left behind....especially
in the joints!
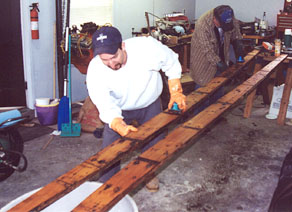 My original plan was to re-fasten the stringers to the frames at joints
that appeared marginal. There was really a 'mixed bag' of bolts,
screws, washers, and nuts utilized over the years.........upon closer inspection
they ranged from rusted blobs that were once bolts to fractured lag screws.
The more I looked....the worse I felt about each of the joints. After removing
a few of the fasteners I discovered there was no actual bond between the
frames and the stringers at ANY of the joints. Therefore, I have
removed, stripped and restored the stringers with penetrating epoxy. Here
is my father and I getting the last bits of black paint off of them and
ready for the epoxy. I will re-fasten them with new stainless bolts,
locknuts and washers. My original plan was to re-fasten the stringers to the frames at joints
that appeared marginal. There was really a 'mixed bag' of bolts,
screws, washers, and nuts utilized over the years.........upon closer inspection
they ranged from rusted blobs that were once bolts to fractured lag screws.
The more I looked....the worse I felt about each of the joints. After removing
a few of the fasteners I discovered there was no actual bond between the
frames and the stringers at ANY of the joints. Therefore, I have
removed, stripped and restored the stringers with penetrating epoxy. Here
is my father and I getting the last bits of black paint off of them and
ready for the epoxy. I will re-fasten them with new stainless bolts,
locknuts and washers.
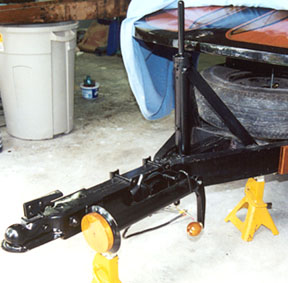
New coupler we added and front pin assembly
we machined. I made the pin removable if I ever need to change it
down the road. We also made some wooden accents to spruce up the
trailer!

Here are the stringers......completely stripped
of paint/varnish and sanded down to bare wood. They are still in
great shape!

Anytime you atomize epoxy you better have
the right protection! I put on two coats of deep penetrating epoxy before
building it back up with varnish.

The interesting point of this photo is that
I didn't fall off the roof when taking the picture and you cannot see any
black paint in the interior! (this is of course from 15').
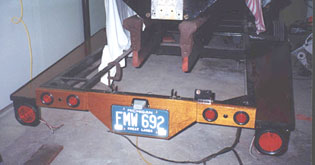
A new rear bumper has been added to the trailer
along new with matching step boards on the sides.
 Lisa made the mistake of coming out to the
shop and saying, 'Hey - whatcha doing?' She was immediately commissioned
as the 'Chief Petrified Putty Remover' and was put to work. Lisa made the mistake of coming out to the
shop and saying, 'Hey - whatcha doing?' She was immediately commissioned
as the 'Chief Petrified Putty Remover' and was put to work.
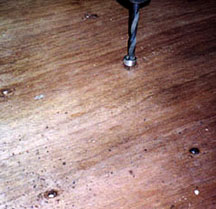 Once all of the putty was removed, the next
step was to back out all of the wood screws. Upon inspection, the
screws on the whole were in good shape but all of them were loose.
The actual screw holes were in great shape (none of them were stripped)
but they did have a very thin layer of soft wood within the countersink.
I put a small collar on a modified drill (the point was ground to match
the original countersink) and set it so that it just removed the thin layer
of soft wood. Once all of the putty was removed, the next
step was to back out all of the wood screws. Upon inspection, the
screws on the whole were in good shape but all of them were loose.
The actual screw holes were in great shape (none of them were stripped)
but they did have a very thin layer of soft wood within the countersink.
I put a small collar on a modified drill (the point was ground to match
the original countersink) and set it so that it just removed the thin layer
of soft wood.
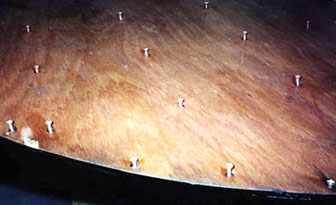
Each hole was prepped with penetrating epoxy
and a new silicon bronze wood screw with a Frearson drive was installed.
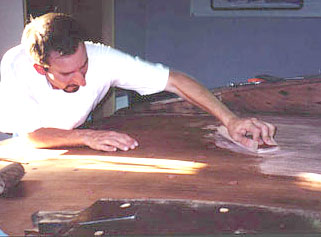
Once all of the screws were replaced each
of the holes were carefully packed with putty and then hand sanded down
to be flush with the bottom surface.

Some of the main stringer attachments had
what appeared to be a hand-made countersunk stainless steel washers under
the heads of the bolts. Keeping with the tradition, we made a quick
hammer die and knocked out a couple dozen washers.
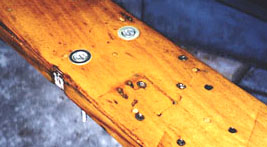 The washers give the main stringer attachment a nice finished look. The
restoration will keep progressing throughout the winter in my new heated
garage. The washers give the main stringer attachment a nice finished look. The
restoration will keep progressing throughout the winter in my new heated
garage.
|

Let me put it to you this way......if you
own a wooden boat that is more than five years old I can just about guarantee
you have some form of wood rot. However, sometimes you have to be like
a detective to find it. My hull cosmetically looked very solid but
after spending so much time around it I was able to see certain clues that
made me wonder. I drilled some inspection holes in the sponson tips
(this area was always hidden) and in one of them I was concerned enough
to open it up. AND THIS IS WHAT I FOUND! Now....mind you......I
was glad I did this but at the time of discovery I was a bit 'worried'
to say the least!
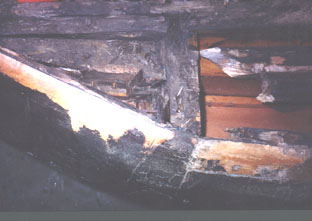
After a little bit of clean up and after
I started calming down....I was able to get a good look at what was going
on. It appears the sponson tip had multiple repairs to it, had very
poor drainage and the years just took its toll. What was encouraging
(if anything??!!) was the fact that the rotten portion was confined to
only the first foot or so of the sponson.
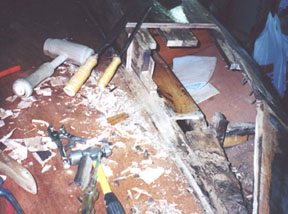 My first attempt in anything I do with my hydroplane is to try to preserve
as much as possible and replace only what is absolutely necessary. Some
people may have replaced the entire sponson after seeing this.....I just
had to see if I could make a structural repair without doing just that.
They key in this step is to keep removing (chisel & wire brush) the
rotted wood until you get to solid wood - and then go a little more. This
picture shows just as I was getting into the 'good wood'. Be sure to stagger
those joints - makes for an easy way to fit the replacement pieces back
in and provides for a strong section. My first attempt in anything I do with my hydroplane is to try to preserve
as much as possible and replace only what is absolutely necessary. Some
people may have replaced the entire sponson after seeing this.....I just
had to see if I could make a structural repair without doing just that.
They key in this step is to keep removing (chisel & wire brush) the
rotted wood until you get to solid wood - and then go a little more. This
picture shows just as I was getting into the 'good wood'. Be sure to stagger
those joints - makes for an easy way to fit the replacement pieces back
in and provides for a strong section.
The first patch of marine plywood goes in.
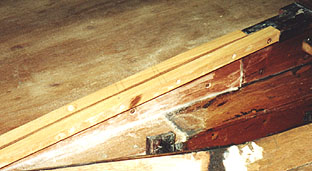
The new pieces consist of marine plywood,
Sitka spruce, silicon bronze wood screws and epoxy. Most of the pieces
could be fit in identical to what was there before.
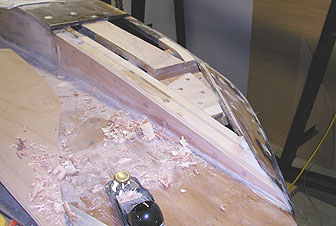
All of the frame pieces in place and one
perfectly placed drainage hole to guarantee the water that gets in can
get right back out!
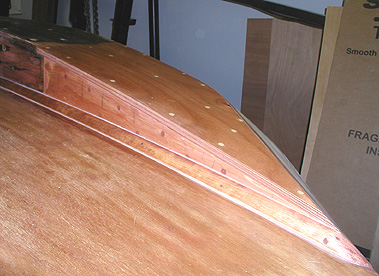
The finished sponson bottom with two sheets
of marine plywood and the molding added back into place. It sure
does look much better then it did when I first opened it up. I believe
the fix will be 'better' than when it was new!
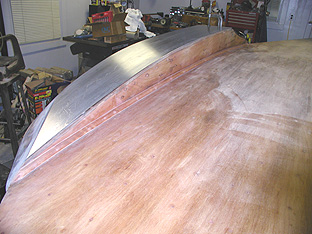
The next step is to cut out and fit the aluminum
to the bottom. I used 5052-H32 temper because of its toughness, its
ability to take the shape of the sponson and it can be buffed out to a
nice shine. The pieces I'm using are .090" thick.
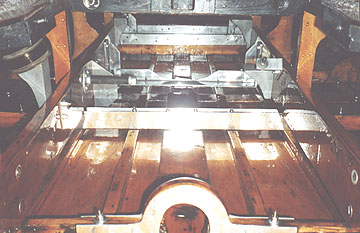
A photo of the finished aluminum pieces that
have been painstakingly cleaned of varnish, cleaned of the now infamous
'black paint' and then shined back up.
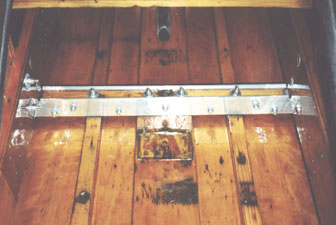
Probably an old race incident fractured
this frame in two right down the middle. It then had wood braces
nailed to each side and another wood brace nailed to the top. All
of this was mushed together with some type of old marine sealant.
When everything was scraped away I was left with the original frame.
I decided to go with a sandwich of 6061-T6 aluminum so it would match some
of the other cross bracing in the hull.
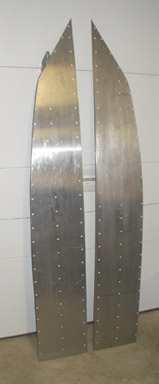
The aluminum for each sponson has now been
fitted, holes drilled and countersunk.
|
 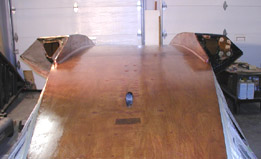
The first coat is penetrating epoxy and it
went on very smooth. Next I will build it back up with varnish.
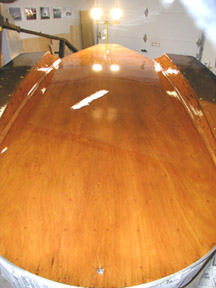
10 coats of varnish later on the bottom
and it looks great. I also repainted the black on the sides of each
sponson with polyurethane enamel. Now......nothing like watching
varnish cure!
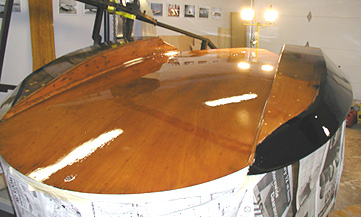
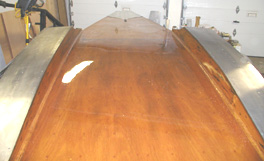
The
battle armor is now in place! The aluminum went on fairly easy...just a
slow process. I pre-drilled each hole and prepped it with penetrating epoxy.
I used 'black' 3M 5200 marine sealant so when it squeezed out it matched
my black paint job. I'll let the sealant and the varnish fully cure and
then I'll buff the aluminum.


Another interesting shot showing the bottom
design of my Lloyd hull with the new aluminum.... again....another successful
picture outing up on my roof without falling off.

Who says Lloyd didn't build a tilt trailer??!!
Mine tilts just fine!
Actually this shot depicts me bringing the
trailer down from its 'winter storage' position which was up against the
wall.
I'm going to weld on new fenders and rewire
it while the bottom varnish is in its final curing stages.
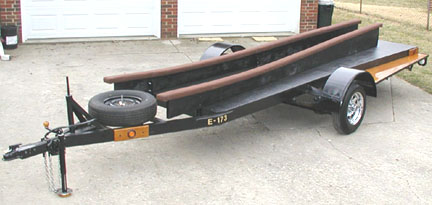
 New
suspension, added fenders, new electrical, added a deck, new wood accents
and all kinds of other new 'stuff' has been added. That's it - no
more trailer work! Yippee! The trailer is now ready for some
serious road trips to vintage hydro events!!!! New
suspension, added fenders, new electrical, added a deck, new wood accents
and all kinds of other new 'stuff' has been added. That's it - no
more trailer work! Yippee! The trailer is now ready for some
serious road trips to vintage hydro events!!!!
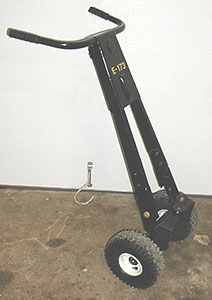
This
is what is left of my old roto-tiller after I 'chopped' it up. It
is now known as the 'Agitator Pit Shuttle'. It proved to be a life
saver at Dayton when you had to stage your boat by yourself!
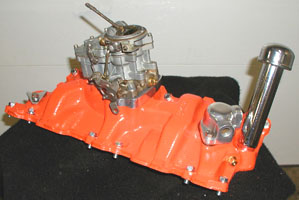 The
plan is to have two motors (1956 265 Chevy V8's) rebuilt to stock as they
would have been when the hydro was racing. Finding the original parts has
been a very difficult process, but patience has prevailed. Here is an
original 1956 2 bbl intake manifold I found at a local junkyard. I also
found an original Rochester 2 bbl carb. I have rebuilt/restored both of
them and here is a shot of the finished product. So far I have both blocks
rebuilt to .030" over. The
plan is to have two motors (1956 265 Chevy V8's) rebuilt to stock as they
would have been when the hydro was racing. Finding the original parts has
been a very difficult process, but patience has prevailed. Here is an
original 1956 2 bbl intake manifold I found at a local junkyard. I also
found an original Rochester 2 bbl carb. I have rebuilt/restored both of
them and here is a shot of the finished product. So far I have both blocks
rebuilt to .030" over.
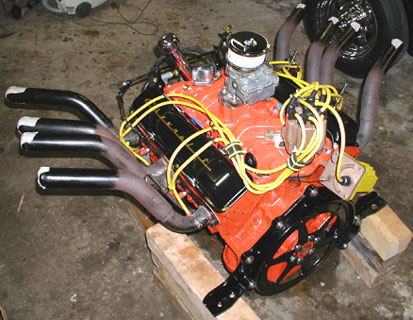
The first 'Stock Bullet' rolls off the Radue
Pit Crew assembly line. If it runs half as good as it looks.......I'll
be all set!

A
neat photo of the bearing mount which displays the original hull builders
name - Charles Lloyd.
|
Alan Radue's Agitator
Trip to Dayton Testing 2002 - Maiden Voyage
 Here
is the 'Radue Pit Crew' rig. All set and ready to go to Dayton.......Did
I remember to tighten the lug nuts on the trailer?.....Is the prop in the
back seat?............Did I remember my helmet?......Where is Lisa? Here
is the 'Radue Pit Crew' rig. All set and ready to go to Dayton.......Did
I remember to tighten the lug nuts on the trailer?.....Is the prop in the
back seat?............Did I remember my helmet?......Where is Lisa?

We made it!!!
To Jack Hines house that is.....
Lisa and I posing for a quick snap shot.
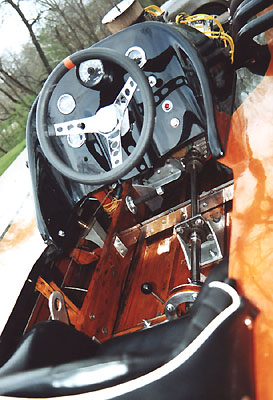 |
Everyone said the inside
is WAY to shiny and we need to scuff it up a little.........this sent chills
up and down my spine..................do you
mean I can't race with socks on?
 A young man and this very boat were the
beginning of an OUTSTANDING professional hydroplane racing career.
Here stands Ron Snyder with his 'very first' hydroplane......a reunion
after 30+ years. A young man and this very boat were the
beginning of an OUTSTANDING professional hydroplane racing career.
Here stands Ron Snyder with his 'very first' hydroplane......a reunion
after 30+ years.
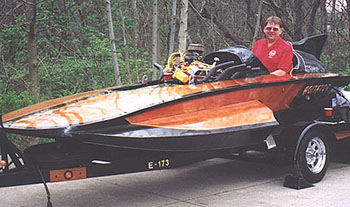
Another unbelievable picture. Ted
Williams, a former owner of the hull Scruluce E-39 in the early
to mid seventies, sits in his old office. Ted asked me 'Can I sit
in it'? What is amazing to me is you can actually leap from a standing
position outside the hull into the cockpit - I wouldn't have thought this
was possible but Ted proved me wrong one second after I said 'Sure'!
What great memories that must have brought back.....hard to imagine.

The Hines' hydroplane party Friday night
was fantastic!!! Great food and great times and we owe it all to Jack and
Nancy. We had 3 vintage hydro's at his place not including Jack's boats.
Shown are the Agitator, Opeechee and Dinomytes. If
you look real close in this photo you can actually see as the sun goes
down the hydroplane B.S. is increasing!

For the 10 seconds, The Johnson clan checks
out the new Agitator bottom. Travis on the left.....Papa Joe
in the middle and Brian on the right. You can tell by Joe's face
he is wondering who that good looking guy is in the reflection that is
looking right at him??!!
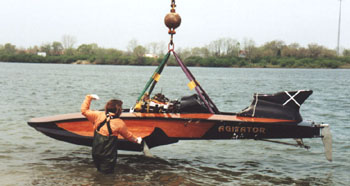
Lisa directing the crane operator.
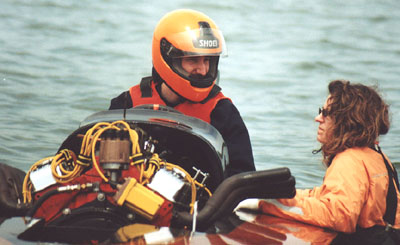
| Last minute
advice............go slow.....turn left! |
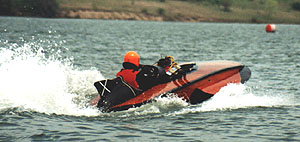
Here we go!! Childhood dream in progress!!

| Vintage action! |
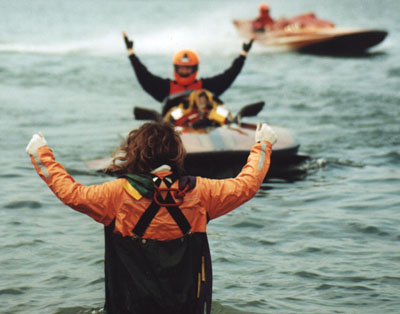
The 'THRILL
OF VICTORY
Coming in and pulling the plug on the 'magic
carpet ride'. |
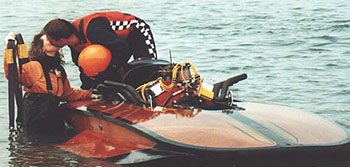
Now I bet there are not too many ladies
who would carry the lifting straps out to your incoming hydroplane in waders..........so
you better treat those ones 'extra special'!!!
 The Father &
Son team...a very special picture for me. The Father &
Son team...a very special picture for me.
My sincere thanks to Brian Johnson, Bill
Fisk, Wally Hinman and Ted Williams who took the time to send me photo’s
of this special day. Thanks for
the memories!
|
Everything You Do - You
Only Have One First Time
By Alan Radue
| I think it is a really good idea to write
this article as fast as I can and get it out there. I have no photos
and I have no videos to shape my thoughts right now. I have nothing
to go by except the memory of what I have just experienced for the first
time. I bet every hydroplane driver can recall in detail the day’s
events.
Since this past Saturday I have so many things
tucked in my memory banks I can already hear the phone ringing from Phil
Spruit saying ”O.k. Al, I appreciate you writing articles but aren’t you
going a bit overboard?!” True to my restoration efforts and true
to my passion for hydroplanes, here comes another one whether you like
it or not. This is not a polished story or a flashy one filled with
pictures. At this point I don’t think it should be. Heck, I
don’t think I’m even going to spell check it. Here it is, the experience
of my first time piloting a 3-point hydroplane….something I have looked
forward to doing since I was 10 years old.
First and foremost you have to consider the
time and effort that has been put in getting to the point of actually making
the first ‘fly-by’. I will now attempt to recap in great detail
what I have done to this point. JUST KIDDING - that will probably
come out this winter and rival a copy of ‘War and Peace’.
So lets pick it up as we are pushing the
‘Agitator’ towards the crane.
I’m standing there running through the countless
things that are going through my head. Show Lisa how to undo the
double release hooks that are on my lifting straps, make sure I remember
to put a little gas in the carburetor before it goes up on the crane and
then up pops a very familiar face. It is the face of Phil Kunz.
He takes the time to remind me, ”Hey - you got wet sponsons…….make sure
you idle out for ten seconds before you gas it…….you have to give them
time to drain……then get on her and she’ll pop right up”. Seems simple
huh? But the act of Phil taking the time to tell me this is what
I really remember. Isn’t it always easy to notice somebody who is
passionate about something? It has always been that way for me.
At this point I was all ears.
So here comes the crane ball hook coming
down and then up goes the ‘Agitator’. Now honestly, does anyone
else who has built or restored one of these hulls not think this is the
MOST terrifying thing they have ever seen? It is the equivalent of
grabbing your entire set of expensive fine china and then sprinting down
the stairs. You know it could probably be done without incident but
you would hate to have a front row seat to such an event. I felt
a little easier when I started hearing ‘Hey - that looks like my coffee
table’ and ‘WOW look at Al’s bottom’ with just the slightest hint of sarcasm.
The hull settled in the water and I watched the wet sponsons fill up with
a feeling of great anxiety. I hoped all the water going in was just
in the sponsons! Now I have to admit, I thought a 1950’s era Lloyd
hydroplane looked good out of the water but I’ll tell you there is nothing
like seeing it floating. I can’t wait to get the pictures and I’m
sure there will be a call for more web space once I get a hold of them!
So now in typical fashion Lisa was by my
side in waders nonetheless and trying to figure out how to spin the hull
around and get me in the right direction. It was at this point when
I noticed a very curious thing. I was not nervous at all. And
I have a very good reason for it. As Lisa spun me around I was facing
the shore and I looked up on the bank. I saw tons of faces and I
recognized almost every one. What a great feeling that was.
There was my Mom and Dad who made the trek down that morning to see their
son doing something he has talked about non-stop for the past two years.
There were two good friends of mine that I have known for years……Wally
and Ed….who also made the trek down that morning. There was Ted Williams
and Ron Snyder both former owners of my hull. I saw Phil Kunz pointing
‘that famous lens’ right at me and thought…..gee….I hope I don’t look like
at dork at this point. There was my good hydro buddy Joe Johnson
who despite not feeling that great treked his whole family down for the
event. Bill Fisk, Jack Hines…….and all the fantastic people I have
met the past couple of years. I almost felt like you could have pulled
me out and I could have went home a satisfied man.
WHAT?! Wait a minute! Are you kidding
me?! Lets get the show on the road! But as Ted has told me
”Racing is all about hurry up and wait”. This time was no exception.
When I heard somebody say “Alan you are clear
to go” that was it for me. Lisa spun me around, I hit the starter
and she fired right up. Ten seconds I waited and I could literally
feel the boat getting lighter. At about 15 seconds I was thinking
”Hey…am I on plane?” The thought barely left my head when it looked
like the front end lurched up at least six feet. Probably only an
inch or two in actuality but then I felt this wooooooosh and the back end
jumped up and there you have it. I was on plane. Now I would
like to say my motor was in tip top shape and the old Agitator and
I just tore up the course. In actuality, I didn’t do any work on
it before Dayton (it was still in ‘as found’ condition) but I just couldn’t
pass up the opportunity to try and turn a few laps. The first lap
was crazy. The main thought I had was ‘So - this is what it is like
huh?!’ The boat slides around the turn in an interesting way.
I stayed to the outside as the man in charge told me to and entered the
back straightaway. The engine was still running and that was more
than I could ask for. At this point it was just pure luck.
I came on to the main straightaway and pushed the pedal down as far as
it would go to see how much I had but unfortunately that was about it.
Just cruising speed. Maybe 50mph or so. I look back at it and
I think it was a stroke of luck because it gave me time to really focus
on what I was doing. I reached over each side to feel the exhaust
water….it was warm. I noticed the nearly two gallons of water that
filled my race suit as I walked out to my boat sitting in the hull bottom
as I entered the back straightaway. I undid the transom release levers
and the water quickly disappeared under my seat. I got to the end
of the straightaway and then closed them back up. I looked down and
saw no more water and thought ‘Huh…they worked just perfect’. On
one pass of the front straightaway I noticed some guys on shore and the
thought cracks me up even now. They were waving their hats like I
was leading Picket's charge at Gettysburg! I just wish I could have
had a little more in the motor but that will be for the next adventure.
A few times I looked over my shoulder to see Carl Wilson and Hal Laduc
go thundering into a turn just 20 yards along side of me. I thought
to myself that anyone seeing a site like this would never forget it.
I now can see why all of the former drivers I have watched through the
years made this a lifelong passion. So I took an extra lap over the
5 laps they said we should take and when I saw the black flag come out
I kinda smiled. I pulled in and slowed down and noticed you can actually
feel the boat come off plane. It is similar to sinking in a hole
and gave you the feeling like you just pulled the plug on a magic carpet
ride. I turned off the switch and coasted up to Lisa waiting for
me and asked her ‘How did I do’? She said something really funny.
“HEY - you looked really cute out there!” Now if I was not committed
to getting to my engine work before the next event I’d say now I’d hardly
have the Agitator back in the shop before the engine comes out for
a complete overhaul! I walked on shore and thanked Phil Kunz for
taking the time to give me last minute advice and that was it. Just
some quick thoughts of my experience. I restored a vintage hydroplane
sending not a single piece outside of my shop to have any work done.
I trailered the whole rig down. I got in the water. I turned
6 laps and came in under power. I couldn’t ask for any more than
that. Of course I use ‘I’ in the aforementioned sentences but full
well know there are too many people to list who helped me pull this off.
I sat on shore and was already thinking about
the TON of tweaks I have to make in the next couple of weeks when up walks
Bill Fisk with a sly grin on his face. He says ‘Great job out there
Al’ and shakes my hand. As I pull my hand back I notice there is
something in it….a patch……in the shape of the classic ‘national champion
shield’ it reads ’APBA - Driver’. Enough said……….
Alan Radue
Driver - E-173 Agitator
APBA Vintage Class |
The Gold Cup 2002
 Alan Radue pilots
the recently restored Agitator down the back straight-away (in front
of the DYC) at Detroit's Thunderfest 2002.
| |
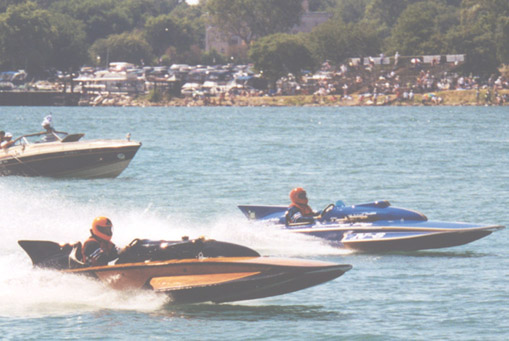
Alan Radue's Agitator and Tom Bertolini's Country
Boy ‘putting on a show’ at Detroit's Thunderfest 2002. A special picture
for Alan for two reasons – this was a long time dream of his to be able
to pilot a conventional hydroplane around the infamous Detroit course and
also the park you can see in the back ground is where Alan watched the
races from for many years!
Photos by Wallace Hinman |
Back to the boats
|
|

